Migrate to Webflow without the friction. No SEO loss, no tech issues, no CMS chaos. Focus on marketing, not maintenance.

Plugin overload
Sites often rely on dozens of third-party plugins, which create security risks, slow performance, and make migrations unpredictable.
High maintenance
Frequent updates, caching issues, and dev dependencies make WordPress hard to scale without constant technical support.
SEO at stake
Even a well-intentioned migration can harm rankings if not done right. Redirects, metadata, and page structure need expert handling to preserve visibility.
The process feels heavy
From content mapping to platform setup, migrations can overwhelm non-technical teams. Without the right partner, they risk delays, confusion, and missed opportunities.
How Flow Ninja makes migration effortless
Migrations don’t have to be risky, slow, or stressful. With a structured process, technical know-how, and full onboarding, we make sure your move to Webflow feels like an upgrade, not a setback.
No more plugin headaches
We rebuild your site in Webflow using native features, eliminating the bloat, security risks, and constant plugin updates.
Flexible publishing
We tailor your Webflow CMS so your marketing team can launch pages and edit content without relying on developers.
SEO preserved, rankings protected
We carefully handle redirects, metadata, and site structure so your migration doesn’t disrupt your organic performance.
No dev team required
Our process is built for marketers. We handle the technical lift, provide guidance, and train you post-launch so you can manage Webflow confidently moving forward.


See how our approach makes a difference
.jpg)
“ Working with Flow Ninja helped us cut costs, improve quality, and build a website that converts.”

.jpg)
“ When we jumped on a call with Flow Ninja, it became clear that they are experts in their field. “

.png)
“ They always manage to do this right away without ever sacrificing the quality of their work. “

.png)
Why Flow Ninja
Full in-house team
A full-service in-house Webflow experts team ready to take your marketing initiatives off your chest and help you build & grow your site.
.png)
Client
experience platform
Easily track active tasks, remaining hours, and other details related to your project in our in-house six star platform
.png)
Access to all our services
Get access to GTM Strategy and consulting, digital design, Webflow Development, SEO and more in all packages.

Tried and true
QA processes
Our in-house QA team ensures all your projects are error-free and optimized for maximum effect.

Get your Webflow migration underway in days, not weeks
We know marketing timelines move fast. That’s why we’ve simplified the process: book a call, get a tailored quote within 24 hours, and start your migration without delays or confusion.
How to Migrate WordPress to Webflow
Migrating from WP to Webflow is a complex process, and we recommend getting in touch with Flow Ninja if you need your website migrated.
Two Main Migration Initiatives
Essentially it is done in two separate parts:
- Recreating the design in Webflow
- Migrating the CMS from WordPress to Webflow.
If done correctly, this could be a relatively straightforward process. However, it's important to mention that it's almost never an automated process. In other words, the migration could get quite complex for bigger sites. Let's explore WordPress to Webflow Migration.
First, let's explain the process of migrating the design from WordPress to Webflow.
Migrating the Design
Moving from WordPress to Webflow means you can't directly transfer your site's design. You need to rebuild it in Webflow. This process is a perfect opportunity to not just replicate your site but improve it. Because Webflow works differently from WordPress, you'll find new possibilities for your design.
Getting Help from a Webflow Expert
Since there's no automated tool to do this for you, having someone skilled in Webflow is key. They'll know how to take your current design and not only recreate it in Webflow but also take full advantage of Webflow's design capabilities to enhance your site.
Here's how Webflow experts can help you:
Recreating the Existing Design
- Layout Reconstruction: They'll start by analyzing the existing WordPress site layout and then rebuild it in Webflow, ensuring that the core structure and user experience are preserved.
- Visual Elements: This includes recreating or updating visual elements such as headers, footers, navigation menus, and content sections within Webflow's designer environment.
Enhancing with Webflow's Features
- Interactivity and Animations: Webflow enables the creation of custom animations and interactions without writing code. The expert can add sophisticated effects that improve user engagement, such as hover effects, scroll animations, and page transitions.
- Responsive Design: They will ensure that the site is fully responsive, utilizing Webflow's tools to adjust layouts, images, and content to look perfect on all devices, from desktops to smartphones.
Optimization and Performance
- SEO Best Practices: Webflow experts will apply SEO best practices directly within the platform, optimizing headings, meta titles, descriptions, and more, to ensure the site ranks well in search engine results.
- Speed Optimization: They can leverage Webflow's built-in optimization features, such as image compression and code minification, to ensure the site loads quickly and efficiently.
Webflow CMS Integration
- Dynamic Content: If the WordPress site utilized custom post types or fields, the expert can replicate this functionality within Webflow's CMS, creating collections and structures that allow for easy content management and dynamic content display.
- CMS Training: Post-migration, the expert can provide guidance on how to use Webflow's CMS for content updates, ensuring the site owners or content managers are comfortable with the new system.
Redesign Best Practices
1. Review and Improve Your Design
Start by looking at your current design critically. Identify what needs updating or improving. This is your chance to make your site more modern and user-friendly. Think about new trends in web design and how they can apply to your site.
2. Use Webflow's Design Tools
Webflow offers a lot of design flexibility. This is a chance to add custom animations, make your site responsive, and create interactive elements that engage your visitors. Webflow lets you do things that might have been difficult or impossible in WordPress.
3. Create a Style Guide
Having a style guide is crucial. It should detail your site's colors, fonts, button styles, and more. This guide will make sure your site stays consistent and makes the design process smoother. It's also a big help for any future updates to your site.
4. Focus on Responsive Design
With Webflow, making your site look great on any device is easier. During the redesign, prioritize making your site responsive. Think about how you can use Webflow's tools to make your site work well for mobile users.
5. Test and Refine
The redesign process should include testing your design and getting feedback. Use Webflow to share prototypes and see how things work in real life. Adjust your design based on what you learn to make sure your site meets your visitors' needs.
Migrating the Content
In most cases, the two big steps to make here is migrating the visual assets and migrating the written content.
Migration of Pictures and Other Visual Assets
Preparation and Export from WordPress
- Inventory: Start by taking an inventory of all visual assets on your WordPress site. This includes images, videos, PDFs, and any other media files used across your site.
- Optimization: Before migration, it's a good practice to optimize these assets for web use. This means resizing images, compressing files, and converting them to web-friendly formats (e.g., JPEG, PNG for images, MP4 for videos) to ensure fast loading times and high performance on your new Webflow site.
- Export: Use WordPress's export tools or plugins to gather your media files. Some tools allow you to download all media files in a single archive, making it easier to manage the migration.
Importing to Webflow
- Manual Upload: Currently, Webflow does not support a direct import of media files from WordPress. You will need to manually upload each visual asset to your Webflow project. This can be done through the Assets panel in Webflow's Designer, where you can upload, manage, and organize your files.
- Asset Replacement: As you rebuild your site's design in Webflow, replace the placeholder images or outdated assets with the newly uploaded media from WordPress. Ensure that each image and media file is correctly linked and displayed within your Webflow site's pages and templates.
{{cta}}
Migration of CMS Content (Blogs and Other Pages)
Here, there's what's called the ideal approach, and then there's the manual approach.
The ideal approach looks something like this:
- Step 1: Download the WP plugin called “Export any WordPress data to XML/CVS” and install it
- Step 2: Activate the plugin for the WordPress website that you want to migrate.
- Step 3: Configure your export settings and click on Migrate Posts.
- Step 4: Click on Confirm & Run Export if all is well and download the CVS file.
- Step 5: Create a new Webflow project (and a Webflow account, if you already don’t have one).
- Step 6: Go to the Collections panel and choose the option to import the CSV.
- Step 7: Import the WP CSV file and map the fields from the file to the fields in you Webflow.
If you get stuck on the last step, we recommend checking this lesson from Webflow University. It’ll guide you through the process of importing CSV fields to Webflow CMS.
In reality, however, WordPress sites are often messy and the content migration process cannot be speed-run. Moreover, the CSV exported from WordPress often needs in-depth configuration to make it suitable for Webflow.
When the automated import of CMS content from WordPress to Webflow is not feasible or preferred, a more manual, hands-on approach is required. This method involves a meticulous process where a developer or content manager manually enters data into Webflow's CMS, ensuring precise control over the migration and organization of content. Here's how to approach this manual migration process:
Step 1: Setting Up Collections in Webflow
Before any content can be transferred, you must first create collections in Webflow to house your content. Collections in Webflow are similar to post types in WordPress, such as blog posts, authors, or products.
- Define Collection Structure: For each type of content (e.g., blog posts), create a corresponding collection in Webflow. Define the fields for each collection based on the content you'll be migrating (e.g., title, post body, featured image, publication date).
- Custom Fields: Make sure to include custom fields that match any specialized content from WordPress, such as categories, tags, or custom metadata.
Step 2: Manual Content Recreation and Entry
Once your collections are set up in Webflow, you can start the manual process of recreating and transferring content.
- Content Mapping: Begin with identifying the key sections and elements of your WordPress content. For a blog post, this might include the title, body text, featured image, author information, categories, and tags.
- Manual Recreation: In Webflow, recreate the structure for each piece of content within the appropriate collection. This involves manually creating a new item in the collection and then copying and pasting content from WordPress to the corresponding fields in Webflow.
- Formatting and Media: Pay special attention to formatting text and embedding media. You may need to adjust text formatting (headings, lists, bold or italic text) to match the original content. For images and other media, upload these assets to Webflow and insert them into the appropriate collection fields or directly into the content body.
Step 3: Detailing and Optimization
With the basic content transferred, it's time to refine and optimize each entry for the best performance and user experience on Webflow.
- SEO Details: Update SEO settings for each piece of content, including meta titles and descriptions, to ensure they are optimized for search engine visibility.
- Responsive Design: Ensure that images and embedded media are responsive and display correctly across all devices. Webflow offers tools and settings to help you adjust how these elements behave on different screen sizes.
- Internal Linking: Manually update any internal links within your content to point to the correct pages or posts within your new Webflow site.
Step 4: Review and Testing
After all content has been manually entered into Webflow, a comprehensive review and testing phase is crucial.
- Content Review: Go through each piece of content to ensure that all information has been correctly transferred and formatted. Check for any missing elements or discrepancies from the original WordPress site.
- Functionality Testing: Test all interactive elements, such as links, forms, and buttons, to ensure they work as intended. Also, review the site on various devices and browsers to ensure compatibility and responsiveness.
- Performance Optimization: Utilize Webflow's built-in tools to optimize site performance, including image optimization and site load testing.
Alternatively, you can always get in touch with Flow Ninja if you want your entire site migrated from WordPress to Webflow by professionals.
{{cta}}


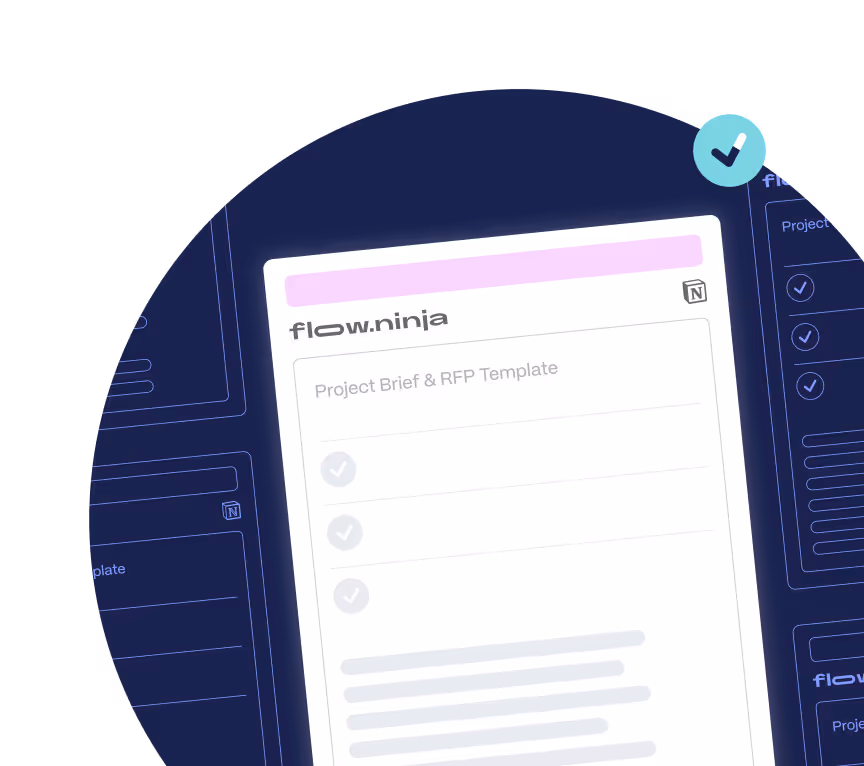
WordPress to Webflow Migration Checklist
.png)

.png)

in mind?
Talk with our team and learn how your ideas can become digital experiences.


-min.png)
Webflow Migrations FAQ
How do I migrate from WordPress to Webflow?
We’ve outlined a general migration overview on this page, but the complexity depends on your website’s size and setup. For smaller sites, migration can involve exporting content from WordPress, redesigning it in Webflow, and importing data via CSV or manual entry.
For larger, marketing-led websites with integrated MarTech stacks and SEO considerations, the process becomes more strategic. In such cases, partnering with a Webflow agency like Flow Ninja ensures a smooth, secure, and scalable transition.
What are the common challenges when moving from WordPress to Webflow?
The biggest risks are related to SEO and content integrity. If not handled carefully, you could face broken URLs, faulty redirects, and data mismatches that hurt search visibility.
At Flow Ninja, we’ve developed robust systems to preserve your rankings, implement precise redirects, and ensure your content and CMS structure are optimized for Webflow, all without compromising your marketing performance.
Will I lose SEO rankings if I migrate my WordPress website to Webflow?
Minor fluctuations in SEO rankings are normal during any migration, typically lasting a few days to a couple of months. What truly matters is setting a strong technical SEO foundation in the new Webflow setup with clean redirects, structured metadata, no broken links, and crawlable architecture.
Flow Ninja ensures all SEO essentials are migrated properly and offers post-launch support to monitor performance and accelerate organic growth.
How does Flow Ninja ensure a smooth WordPress to Webflow migration?
We’ve completed numerous WordPress to Webflow migrations for clients across industries. You can explore our case studies and webinar recordings for real-world examples.
From discovery and CMS mapping to custom design and SEO setup, we manage the entire process end-to-end, keeping your marketing needs at the center. If you’re interested, book a call and we’ll walk you through exactly how our migration process works.
Can Flow Ninja help with post-migration maintenance or ongoing marketing support?
Absolutely. Flow Ninja is a full-service Webflow agency with in-house designers, developers, SEO strategists, and project managers.
After migration, we can help you build new landing pages, optimize content, integrate MarTech tools, and support your long-term growth strategy. Whether it’s technical upkeep or conversion-driven campaigns, we act as an extension of your marketing team.
How is content and CMS data from WordPress transferred into Webflow’s CMS?
For basic content, it’s possible to export from WordPress and import into Webflow via CSV. However, real-world migrations are rarely that simple. WordPress and Webflow structure content differently, and in most cases, we map, clean, and manually migrate CMS items to ensure consistency and scalability.
Our team ensures your data hierarchy and relationships are preserved, especially if you’re using custom post types, categories, or advanced taxonomies in WordPress.
Will my website performance, security, and accessibility improve after switching from WordPress to Webflow?
Yes, especially if your current WordPress setup relies heavily on plugins or shared hosting. Webflow offers enterprise-grade hosting out of the box, which improves speed and stability. It also reduces your attack surface by eliminating plugin dependencies.
On the accessibility and compliance side, Flow Ninja implements WCAG-compliant standards and supports any additional legal or regulatory requirements relevant to your industry.
How long does a typical WordPress to Webflow migration take with Flow Ninja?
Timelines depend on the size and complexity of your site. Small-scale projects can take 2–4 weeks, while enterprise-level migrations may span several months.
During your discovery call, we’ll assess your current site, define scope, and give you a tailored quote and timeline to plan around.
What makes Webflow better than WordPress for marketing-led teams?
Webflow eliminates the need for constant developer involvement. Once set up properly, marketing teams can launch and update pages using drag-and-drop components—no plugins or code required. The CMS is fully customizable, fast, and secure.
With Webflow, marketers gain full control over campaigns, landing pages, and on-site optimization, accelerating time-to-market while reducing dev bottlenecks.
Are there any WordPress-specific issues that I can solve by moving to Webflow?
Two major WordPress pain points often emerge during migration: plugin overload and high maintenance. Many WordPress sites slow down due to too many third-party tools, which also introduce security vulnerabilities and recurring costs.
On top of that, scaling on WordPress typically requires heavy developer involvement. Webflow solves these by offering a secure, performance-optimized, and fully visual platform. This is ideal for growing businesses and agile teams.
Migration From Other Builders and CMSs to Webflow
WordPress, Wix, Squarespace, and many other services for site building and managing content are on Flow Ninja’s Webflow migration list. Take a look at each of the popular builders and learn more about our migration process.
.svg)
.svg)

.svg)
.png)

.svg)
.webp)
.svg)