

.svg)
How to Add a Slider in Webflow?

Key takeaways
- Webflow’s slider component lets you showcase multiple images, videos, or text in an interactive carousel.
- Sliders can be fully customized with animations, transitions, and navigation controls in Webflow Designer.
- You can easily add, duplicate, or reorder slides directly from the slider settings panel.
- The component supports autoplay, infinite looping, and touch gestures for a smooth user experience.
- Styling options let you adjust colors, spacing, and shapes of arrows and navigation dots.
- Webflow sliders are responsive by default, ensuring a seamless look across all devices.
Webflow made adding sliders easy with the slider component. In this guide, I’ll explore this component and help you customize your slider.
What is a Webflow Slider?
A Webflow slider is a dynamic component offered within the Webflow Designer interface that allows you to create and customize a sliding interface for showcasing multiple pieces of content sequentially.
This feature is versatile, supporting a range of content types, including images, text, and videos, all within a fluid, user-controlled carousel. The slider can be customized extensively through Webflow's visual editor, enabling designers to adjust everything from the transition effects between slides to the slider's overall appearance and navigation controls.
Utilizing sliders in Webflow boosts the visual appeal of your website and improves user engagement by allowing visitors to interact with the content actively.
Moreover, the slider component is designed with responsiveness in mind, ensuring that your slider looks and works great on devices of all sizes, from desktops to smartphones, such as our free slider collection. This adaptability is crucial for maintaining a consistent and accessible user experience across all platforms.
{{cta}}
A Step-by-Step Guide to Adding a Webflow Slider
Without further ado, let’s check the process of adding Webflow sliders.
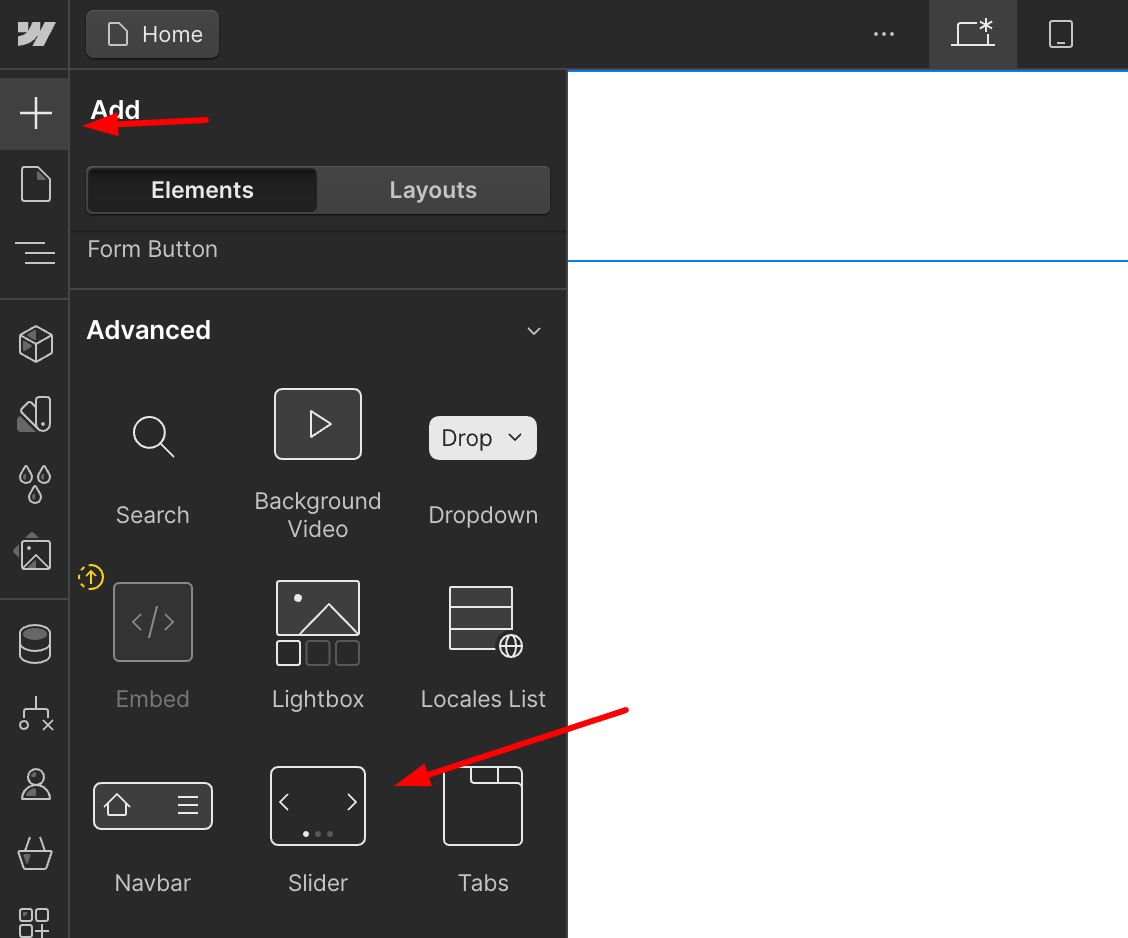
Step 1: Open Webflow Designer and Find The Slider Component
Log in to your Webflow account and open the site where you want to add a slider. Navigate to the page where the slider is supposed to be inserted. After that, click the + button in the left menu of Designer and locate the Slider component.
Drag it to the place of your page where you want to add the slider.
Step 2: Customize the Slider Settings
Once you drag the slider, a new window will pop up where you can configure the slider. It looks like this.
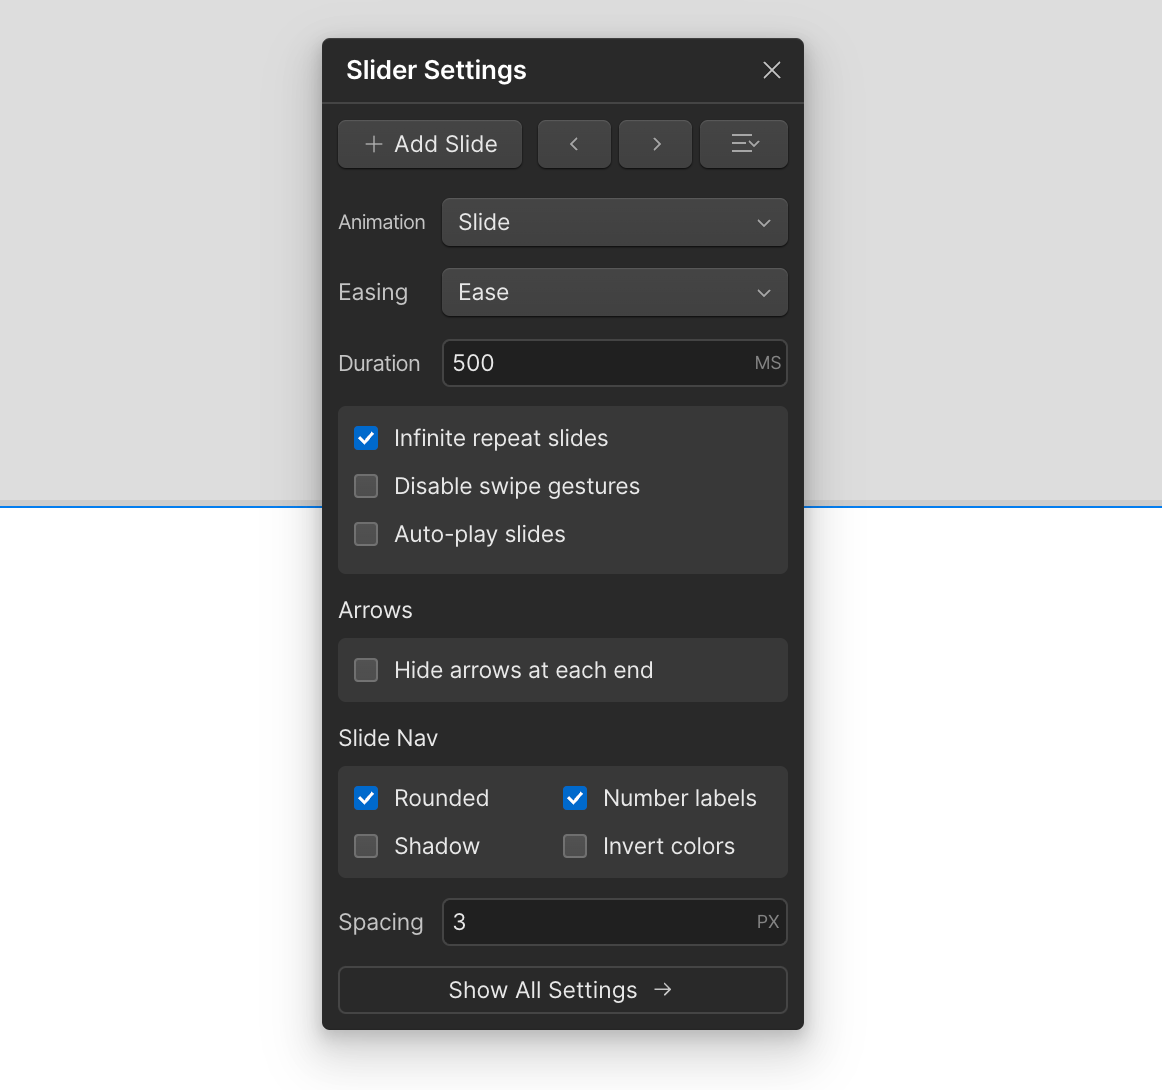
Here's an explanation of each setting:
- Add Slide: This button allows you to add new slides to your slider.
- Left Arrow (<): Clicking this arrow will let you navigate to the previous slide in the slider settings.
- Right Arrow (>): Clicking this arrow will let you navigate to the next slide in the slider settings.
- Equalizer (≡): This might is a button to reorder slides, depending on the context within Webflow.
- Animation: This dropdown menu allows you to choose the type of animation for transitioning between slides.
- Easing: This can be changed to alter how the slide transition feels.
- Duration: Set to "500 MS", which means each slide transition animation will take half a second (500 milliseconds) to complete.
- Infinite repeat slides: This option is checked, enabling the slider to loop back to the first slide after the last slide is reached, creating an infinite carousel effect.
- Disable swipe gestures: When unchecked, it allows users to swipe between slides on touch devices.
- Auto-play slides: When checked, slides will automatically advance after a certain period of time without user interaction.
- Arrows: The checkbox "Hide arrows at each end" hides the navigation arrows when selected. These arrows allow users to manually cycle through the slides.
Slide Nav:
- Rounded: When checked, it makes the navigation dots at the bottom of the slider rounded.
- Number labels: When checked, numbers are displayed on the navigation dots to indicate slide order.
- Shadow: If checked, would add a shadow effect to the navigation dots.
- Invert colors: If checked, would invert the colors of the navigation dots.
- Spacing: Set to "3 PX", which defines the spacing between the navigation dots in pixels.
- Show All Settings: This button, when clicked, expands the panel to show additional settings for more granular control over the slider.
Step 3: Customize Your Slider
If you go to the Navigator option in Webflow, you will see the anatomy of your slider, which looks like this:
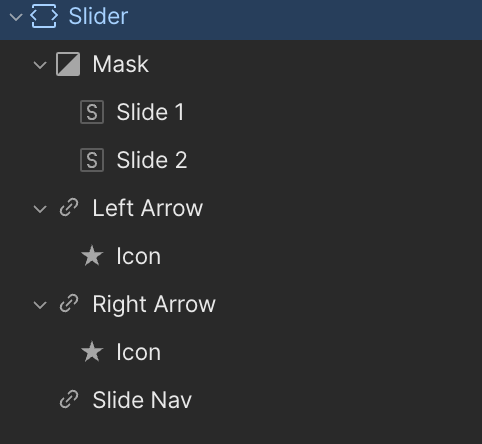
This lets you further customize and stylize your slider elements. For example, if you want to customize the right arrow, you can select it and then open the Style menu on the left to determine colors, padding, and more.
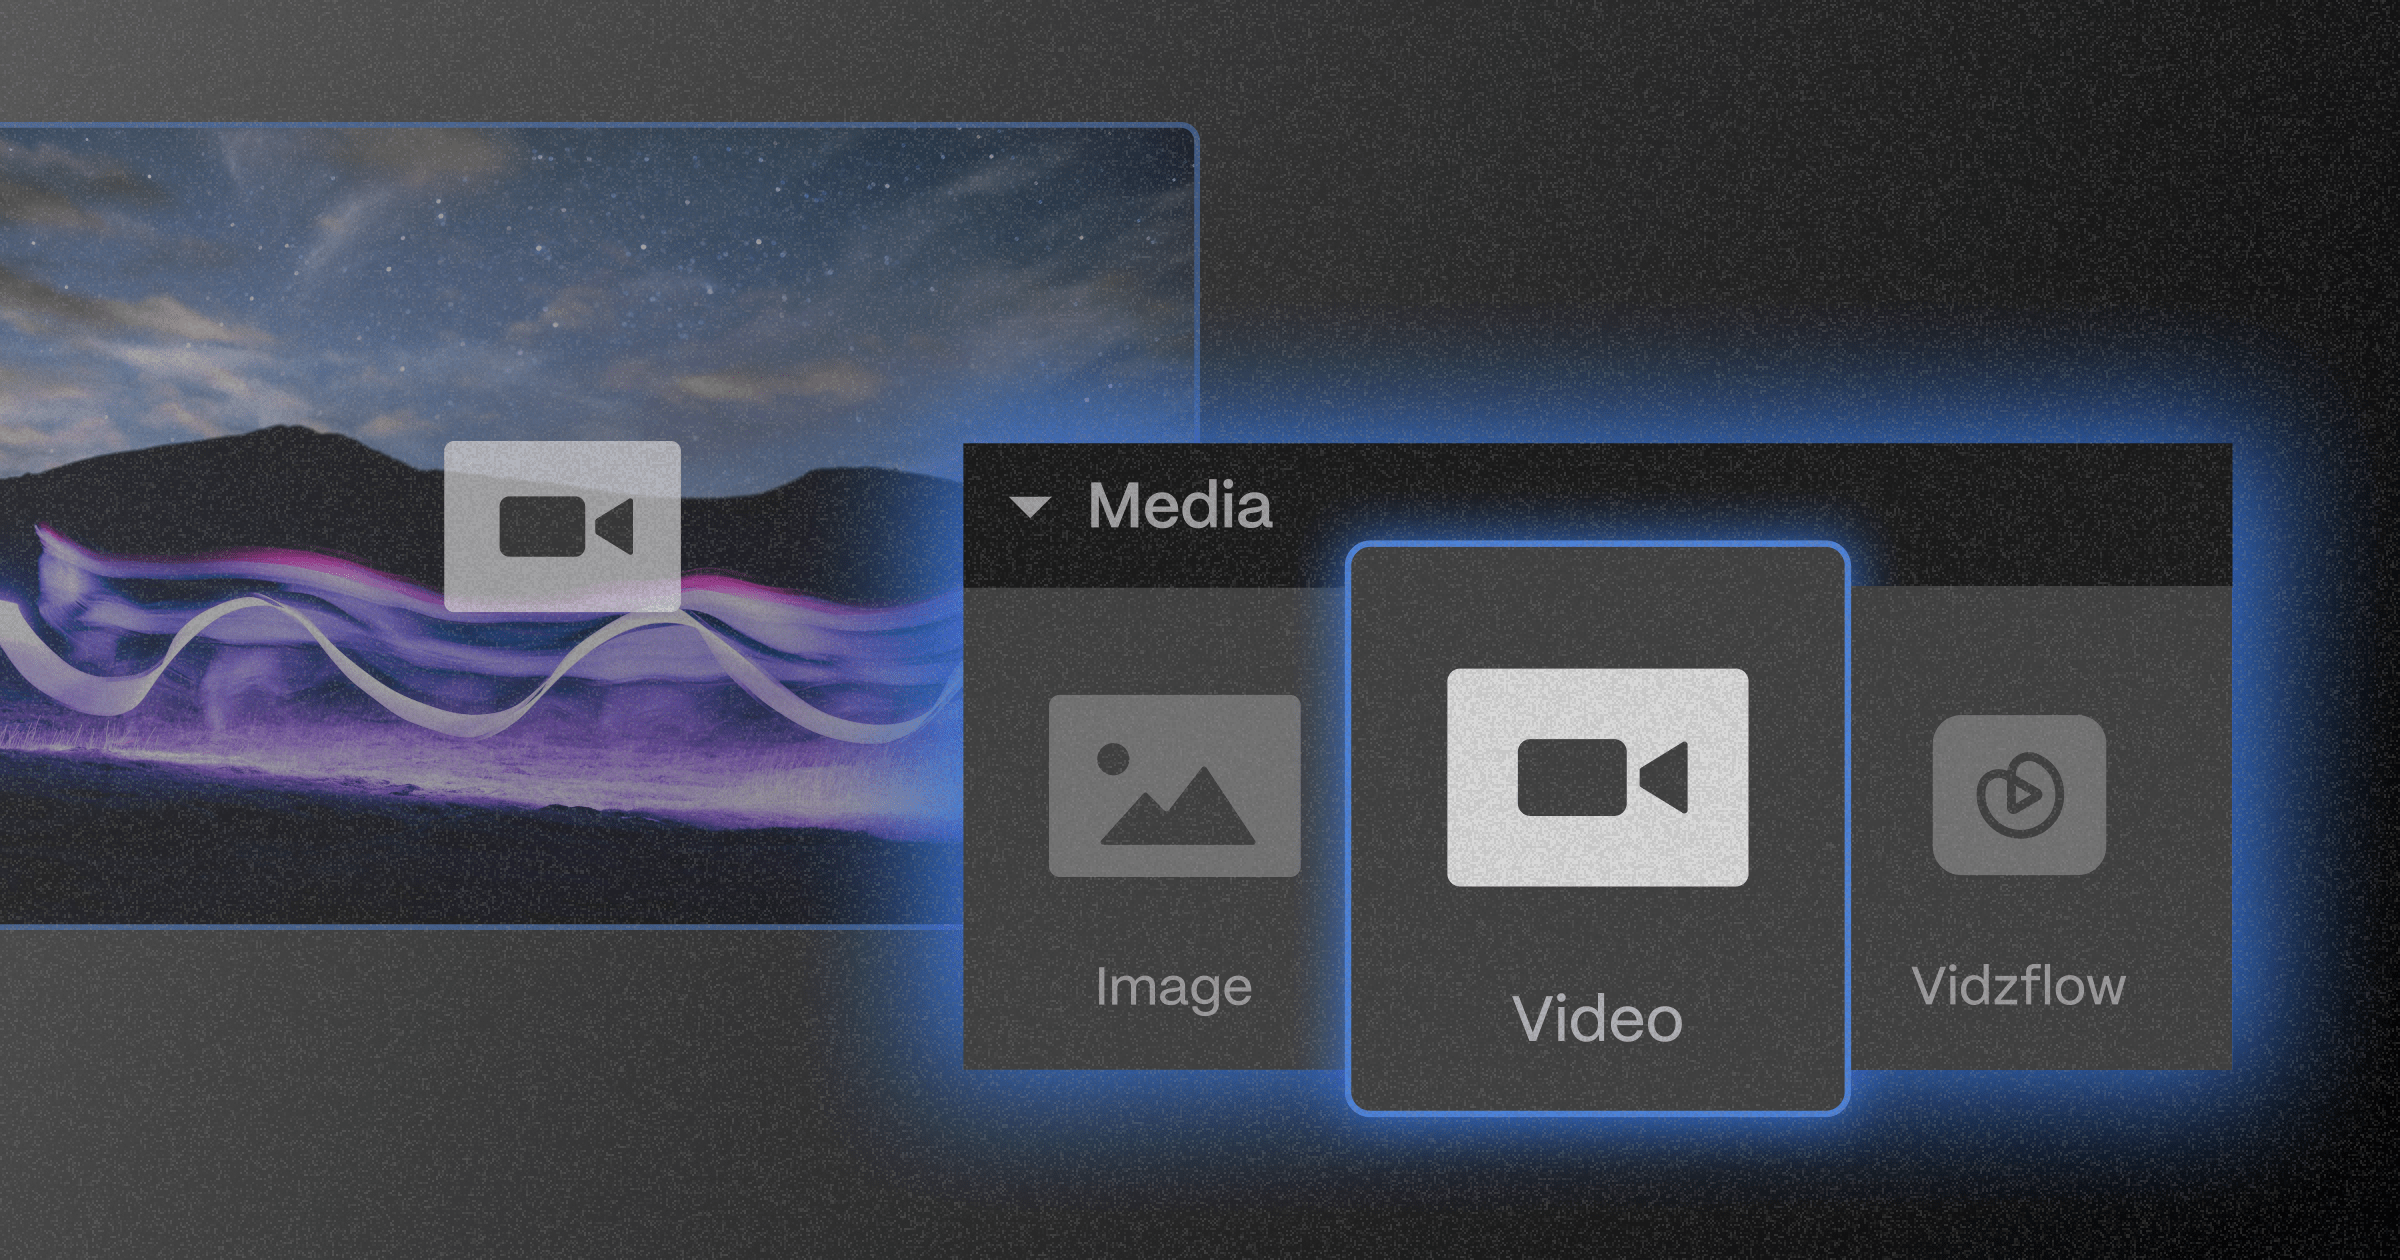
Step 4: Add Images and Content
For each slide, you can add elements to it, just like adding elements to the page. In most cases, you’ll have to add images and content, which are added the same way you would add them, but make sure they are contained within your slide elements.
Step 5: Customize Further
When you add content to your slides, you might need to further customize your slider component, which means returning to the second step and configuring your slider.
Tips on Customizing Sliders in Webflow
Can you customize timing in a slider per slide in Webflow?
While there’s no direct way, you can play around with the fade-in animation duration to make some sliders appear longer than others..
How to add images to a slider in Webflow?
To add images to a slider in Webflow, follow these steps:
- Click on the slider component in your Webflow project to select it.
- Navigate to the elements panel and drag an image element onto the currently selected slide.
- Once the image element is in place, you can upload your desired image or select one from the assets panel.
How to adjust the slider height in Webflow?
Adjusting the slider height in Webflow can be done in a few steps:
- Select the slider component.
- Go to the 'Style' panel on the right-hand side.
- Adjust the height property directly, or set a height for each slide by selecting the slide and then adjusting its height in the style panel.
How to change the color of arrows in a slider in Webflow?
To change the color of the slider arrows in Webflow, do the following:
- Click on the slider component to select it.
- Select the arrow elements within the slider.
- In the 'Style' panel, find the color property and choose a new color.
If the arrows are images or icons, you may need to replace them with versions that have the desired color.
How to duplicate a slide in Webflow?
Duplicating a slide in Webflow is straightforward:
- Select the slide you wish to duplicate.
- Look for the 'Duplicate' option in the Webflow interface (usually indicated by two overlapping squares) or right-click on the slide to find the Duplicate option
- Click this option, and a duplicate of the selected slide will be created immediately after the original.
How to place a button over a slider in Webflow?
Placing a button over a slider in Webflow can be done with these steps:
- Select the slider component you want to place the button over.
- Add a 'Div Block' element over the slide where you want your button to appear.
- Set the 'Div Block' to an absolute position within the slider, which will allow you to place it anywhere over the slider.
- Drag a button element into the 'Div Block' and position it as desired.
- Customize the button's style as needed in the 'Style' panel.
FAQ for Adding a Slider in Webflow
What are the best practices for slider performance optimization in Webflow?
To optimize slider performance in Webflow, reduce image file sizes, limit the number of slides, avoid embedding multiple animations, and disable autoplay if unnecessary. Prioritize lazy loading for media and use WebP formats for better loading performance across devices.
How can you connect a Webflow slider to CMS content dynamically?
You can bind a Webflow slider to CMS collections by using the Collection List component inside a slide. Set up one CMS item per slide and use conditional visibility or pagination features to structure slide content dynamically.
Can Webflow sliders be integrated with third-party JavaScript libraries like Swiper.js?
Yes, Webflow sliders can be enhanced using custom code to integrate third-party libraries like Swiper.js. Embed the necessary JavaScript and CSS in the page settings or inside an Embed element and structure elements accordingly.
Is it possible to create vertical sliders in Webflow?
Webflow's native slider is horizontal by default, but vertical sliders can be created using custom CSS and JavaScript, or by integrating a third-party library like Swiper.js that supports vertical slide transitions.
How do Webflow sliders compare to sliders in WordPress page builders like Elementor?
Webflow sliders offer more design flexibility and cleaner code, while WordPress builders like Elementor provide quicker setup and more plugins. Webflow is ideal for custom workflows, whereas Elementor is convenient for non-technical users.
Are Webflow sliders accessible for users with disabilities?
Webflow sliders can be made more accessible by adding alt text to images, using keyboard navigation, ensuring contrast ratios, and including ARIA labels. Accessibility improvements often require custom code alongside Webflow’s native settings.
Can you trigger animations or interactions when a specific slide appears in Webflow?
Yes, Webflow's Interactions feature allows setting animations that trigger when a specific slide becomes visible. Use the Page Trigger 'Slider Change' and target specific elements within individual slides for tailored effects.


_(1).png)
.png)


.png)


.svg)

.png)
.png)
.webp)
.svg)

